Make-Up, Skincare, Hair Care
-
How to layer your skincare
Most of us have cabinets heaving with skincare products to achieve beautiful skin or tackle an outbreak of spots. You might also have a serum to soften lines and plump skin, a facial mist to calm inflammation, and a moisturiser for radiance. But are you getting the glowing skin you desire? If not, it could be down to the order you’re applying your products.
The order in which you use a product, before layering it with others, can make a huge difference to how effective your skincare routine is.
The best way to apply skincare is to go from lightest to heaviest. For example, a serum is of a much lighter consistency than moisturiser, so it goes on first. But the exception is if you need an active product like an acne treatment or a skin brightener to work on your skin. In this case, you want the active product closest to the skin. Give each product time to dry as you work through your morning routine. Fit one in between making a coffee, then put on a second product before brushing your teeth. The final step, moisturiser, is the key to any layering routine, because it seals serums on your skin, which can make them more effective.
The rules for layering aren’t set in stone though, just make it work for whatever your skincare needs are at the time – while also taking into account seasonal changes or to fit your nighttime routine.
Read on for our cheat sheet to layering skincare.
Oily and acne prone skin
All skin types, even oily and acne prone, need proper hydration. But with this skin type you want to balance oil and calm breakouts, so avoid using too many products. Rather than piling on a serum, lotion, and spot treatment, try a multitasking moisturiser that contains antibacterial ingredients, such as Sukin Oil Balancing Mattifying Facial Moisturiser. This fantastic product is enriched with bamboo charcoal to promote healthy pores, and leaves the complexion mattified and balanced.
Dry skin
The more hydration, the better for dry skin. Oils are more quickly absorbed into the skin so choose an oil serum/facial oil such as Neal's Yard Rehydrating Rose Facial Oil post-cleansing. Layer on a thicker day cream, and if you’re experiencing redness due to dry skin, try blending a small amount of a calming serum with a hydrating serum in a process called “cocktailing” which should clear that up.
Normal to combination skin
This skin type doesn’t require a lot of extra products. But if you’re prone to breakouts in the T-zone area, use an oil control product like Murad Oil-Control Mattifier SPF15 in this area only, for a blemish-free, shine-free complexion.
Sensitive skin
Whether dealing with rosacea or eczema, sensitive skin responds best to gentle products and fewer ingredients. Apply a simple, unfragranced moisturiser like Liz Earle’s Superskin Moisturiser to sensitive skin first, and layer serums on top. The cream will reduce the potency of the serums but it means they’re less likely to irritate skin.
Mature skin
Don’t be afraid to cocktail skincare products to increase the benefits needed for this skin type. If using products to target ageing skin, like age spots, dryness, lines, and wrinkles, end your nighttime routine with an anti-aging retinol like SkinCeuticals Retinol 0.3 per cent. Use it over a serum and a cream, as moisturising helps retinol to penetrate better with less irritation.
-
Shiseido!
-
Luscious Lips: 7 Must-Try Lip Tints and Stains
Benetint Cheek & Lip Stain
An old staple, created in the 1970’s for an exotic dancer, we never fail to go back to our favourite, the Benetint cheek and lip stain. Just the right amount of rosy in one drop gives you that sexy flush and it's kiss proof too!
YSL’s Vernis à Lèvres Pop Water
This gloss, stain, lipstick; all in one combination is perfect for that infusion of long lasting translucent colour. The watery intensity comes with a 10 hour hydration effect and stays on the lips without drying them out.
Chosungah 22 Lip Tint and Gloss
This best seller two-in-one lip tint and gloss works towards giving you stunningly glamorous lips. One side of the product works towards giving you vibrant colour through a gel based tent while the other end keeps your lips glossy and hydrated.
Touch in Sol Technicolor Lip & Cheek Tint
This cream-to-powder matte lip and cheek tint is vegan, hypoallergenic, gluten-free and free of all parabens and sulphates. Changing from liquid to powder finish on application, the tint gives a vibrant pout that’s waterproof too!
-
.
-
Life-saving eyeliner hacks every smart career woman must know
“Eye” know you love eyeliner, so I’m betting you’ll dig these genius eyeliner tips and tricks that should become indispensable to your morning makeup regime1. Don’t use eyeliner.
Searching for a smudge-proof solution to streaky gel liner? Drumroll, please: Just don’t use eyeliner. Make for mascara to line your lids instead.
Wait, what? But how? Easy-peasy. Grab an angled eyeliner brush and dip it in your mascara of choice, then brandish the brush as you would any conventional eyeline. Most mascaras have a weightier proportion of waxes and oils in their formulas, making them highly “hydrophobic” (chem-speak for water-repellant) and therefore better suited for our budge-proof purposes. Takeaway: Moisture-resistant mascaras make for an excellent eyeliner alternative.
2. Upside down, you turn me inside out.
Storage is of the essence when it comes to extending the longevity of your liquid liners. Stash ‘em standing upside down in a clean container and let gravity do the work in ferrying the fluid downwards to bathe the bristle tips in fresh formula.
3. Lube up!
By the same token, simply dispense a drop or two of your favourite face oil directly into dehydrated gel pots for instant invigoration. Stir it around the surface of the erstwhile bone-dry eyeliner and it’ll be good to go!
ALSO READ: This ‘silicone breast implant’ may change the way you apply makeup forever
4. Mind the gap.
For a natty negative-space spin on the conventional cat-eye, try this futuristic feline flick trick courtesy of Shu Uemura’s assistant education manager Sophia Chia: “Leave a tiny gap in the middle of the tail for a really cool graphic look.” Product recommendation-wise, try Shu Uemura’s spectacularly smudge-proof Calligraph:Ink liquid liner ($58 for cartridge and applicator), which boasts carefully chosen bristles of varying firmness for a gorgeous glide.

Image: 123rf.com
5. Lock lips with your liner.
A creamy cinnamon or chocolate coloured eye pencil is perfect for pampering your puckers, particularly if nailing moist-matte #KylieJennerLips is your #InstaBeauty goal. If you’re concerned about creases, remember to layer a moisturising salve on your smackers under your colour.
6. DI your eyes with eyeliner.
Most of us with a glancing knowledge of makeup will know that white liner on your waterline, which is the pinkish rim around your eyes, will give the illusion of bigger peepers. Selecting a liner with good glide is absolutely essential for waterlining – you don't want painful tugging around the delicate orbital region. In any case, once you’ve got your white liner on hand, simply start from the inner corners and deftly trace around the contours of your lower waterline. Blink rapidly to transfer some of the white pigment to your upper waterline for a diffused, more natural appearance. So easy!

Image: 123rf.com
7. Engage in some shadow play.
“Eye” adore using single shadow pots – try Cle de Peau Beaute’s beautifully blendable suite of seasonal colours – as a quick-and-dirty stained liner look. All you need to do is to grab an angled sponge to pick up the pigments from the pot. Use fluid, feathery strokes to rim the upper and lower lids, then smudge ever so slightly for a provocative morning-after vibe.
8. Finally, shake it all off.
Well okay, more like swipe it off. Made a makeup boo-boo? Try this quick-and-dirty (or is that quick-and-clean) hack on for size. All you need is a bunch of cotton buds and some micellar cleansing water on standby. Dip the cottony end of your bud in the cleanser, press the wet tip onto the superfluous smudge on your lid, then sweep out and up towards the temples in one deft, decisive move. You can then pat in some concealer to cover up the newly smudge-free swatch of skin.
Right, then. You know the drill: Sharing is caring, so if you’ve got a good DIY hack of your own to recommend, go right ahead and spill it. Here’s to keeping your flick “on fleek”!
-
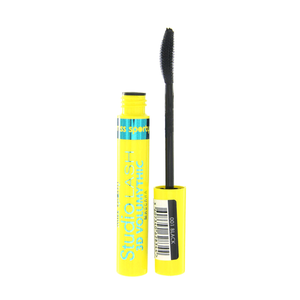
Yellow Maybelline is an amazing mascara. I use this one too.
-
REBALANCE YOUR SCALP TO GOOD HEALTH WITH THESE GENTLE ANTI-DANDRUFF SOLUTIONS
Ugh, dandruff, what a pain. Just imagine, you’re about to go on your first date and you’ve painstakingly put together an outfit that you’re finally happy with. But… no matter the amount of effort you put into dolling yourself up, those loose flaky bites on your scalp will instantly turn your date off. You can try explaining that it isn’t your fault, that you have great hygiene and all, to no avail. You decide to try on anti-dandruff shampoos, in hope of salvaging the situation, only to leave yourself with a more sensitive and dryer scalp than ever. Bummer.
Well, enter L’Oreal two new anti-dandruff range that are powered by gentle essential oils. Containing natural medicinal efficacy, giving you lustrous and healthy hair. So how do they work? Before that, we need to identify how dandruff comes about.
HOW DOES DANDRUFF COME ABOUT?
Dandruff occurs when there is a buildup of sebum (natural oils) and impurities on the scalp, producing dandruff-causing organisms called Malassezia. Yes, you guessed it. This ultimately results in dandruff; itchy scalp with loose apparent flakes.
However, most anti-dandruff shampoos are not tailor-made for your scalp types (yes! Even with dandruff, you will need to choose the right shampoo for your scalp). We advise you to try L’Oreal’s newest Phytoclear and Ever Fresh Range that targets at different scalp types in a gentler and natural way.
IDENTIFY YOUR SCALP ISSUES AND USE THE APPROPRIATE SHAMPOO FOR YOUR PROBLEMS
Phytoclear, the first-ever anti-dandruff shampoo that contains beneficial tea tree essential oil that helps to effective fight dandruff relapse with continued usage.
From the Phytoclear range, there are three tailor-made anti-dandruff shampoo solutions for your scalp, each infused with a blend of tea tree and essential oils.
 If you have oily scalp, try the refreshing shampoo that is formulated with lemongrass essential oil that helps in balancing sebum production while moisturising the scalp.If you have dry scalp, try the nourishing shampoo that is infused with naturally cold-pressed, nourishing orange essential oil that promises to enrich the scalp.
 If you have sensitive scalp, try the soothing shampoo that is fortified with anti-inflammatory french lavender essential oil that is said to soothe your scalp, leaving your hair healthier.If you want to take your hair care regime a step further, then have a go at their dandruff prevention treatment. The Scalp Regulating Spray is the 1st Anti-Dandruff Leave-In treatment that contains 3X Tea Tree Oil vs the shampoos to refresh scalp and effectively fight dandruff relapse.
FOR THOSE WITH COLOURED HAIR
Do you have coloured hair and thus need a gentler anti-dandruff shampoo that cares for you? Then try out their Ever Fresh anti-dandruff shampoo that is formulated with indian lilac, which helps in re-balancing the scalp and control dandruff. Gentle, the shampoo helps in prolonging your hair colour, so you don’t have to worry too much about your dyed hair fading prematurely. It is sulphate and paraben-free, with no harsh salts, meaning that it is suitable even for the most sensitive of scalp.

Photo: Clozette SG
If you want to thoroughly exfoliate your scalp to ensure that the build-up of oils and sebum does not aggravate the dandruff situation, try the Micro-Exfoliating Scrub that contains apricot seeds, which detoxifies flaky build-up on the scalp. Applied on before shampooing, it gently removes impurities, flakes and excess oil that can weigh down the hair. Simply wet hair and apply a generous dollop before massaging it into your scalp and throughout hair. Rinse thoroughly before following with EverFresh Shampoo and Conditioner.
If you’re itching for some, no pun intended, then head on down to Watsons, Guardian and all leading supermarkets and selected departmental stores to get yourself the full works.
Brought to you by L’Oreal Paris
-
-
Of Bikinis and Brazilians: 10 Top Spots to Get That Quick Wax
Painless (relatively!), hygienic and quick - three magic words to look for when it comes to waxing, especially that of our bikini lines. If you have been seeking high and low for qualified technicians, here’s a list of Singapore’s favourites who make a Brazilian or your other waxing needs, easy-peasy.
1. Strip
15 Island-wide outlets makes Strip as convenient as waxing can get. Offering a range of strip options on their menu (Boyzilians included), there’s a reason they’ve been around 15 years! Stamp collector? You can get rewards each time you go strippp.
2. Pink Parlour
This beauty stalwart boasts of over 60,000 clients regionally and have 5 branches across our island! Using only the top waxing brands from Australia, they guarantee an ‘almost painless’ brazilian wax and within 20mins flat. What’s not to love!
3. Nude Wax Parlour
Image source: Nude Wax Parlour
Dedicated to only waxing, for both women and men, Nude Wax Parlour is a haven for wax fanatics. With Bikini waxes starting at just $20, it’s easy on the pocket too! Indulge in some post wax loving with their comforting masks or a tea-tree soothing lotion and it will be as if the wax never really happened.
4. Honey Pot
Honeypot are dedicated to the best standards of hygiene when it comes to ahem, your sweet spot. Using special in-house wax, and no double dipping of spatulas allowed, there’s no wonder Honeypot reign supreme as customer favourites, year after year.
5. NUA
Image source: NUA
This popular Japanese beauty salon from caters to celebrities, models and trendsetters in Tokyo and is equally gaining popularity in our sunny shores too. While their facials are certainly the talk of our town, NUA specialize in hair removal using techniques derived from the Brazilian bush (pun intended!).
6. Expat Beauty Room
April from Expat Beauty room is highly recommended and sought after by expats in Singapore. After 25 years of gaining experience in Sydney, April moved to the red dot to help with our beauty needs. They cover everything from fab facials to waxing galore - safe to say, you are indeed in trustworthy hands.
7. Private Room
Grooming gurus at the Private Room, take care of everything from your brows to your toes. Need a quick wax during lunch hour? Their easy CBD location means, this can truly be a lunchtime ‘quickie’. Throwing a bachelorette? Their Naughty Night Out party package, ensures there’s enough pampering and cheeky fun to go around the room, for everyone!
-
The biggest myth about shaving hair is probably one you believe — here's why
Shaving hair from our faces, legs, armpits, and other parts of the skin is a daily routine that millions if not billions of people follow.
However, many shavers around the world believe a pervasive myth about the practice: that hair grows back stronger or thicker after being razored off.
"That's not been demonstrated to be so," Kurt Stenn, a biologist who's studied hair for more than 30 years, told Business Insider.
We asked Stenn about the notion during a video shoot, since he's a hair follicle scientist who recently dove into the mechanics, evolution, culture, and history of the subject in the book "Hair: A Human History".
Stenn said it's easy to see why people believe the myth. When people shave their hair after awhile, he said, the hair often feels very thin.
"But then they see the hair comes back thicker," he added. "In fact the bottom portion of the hair shaft that's shaved is already thicker."
(Shaving hair removes a thinner part of the shaft, leaving behind its thicker base. As it grows, the follicle thins from wear — but seems thicker-than-normal at first.Business Insider)
This thicker part of a hair follicle's shaft is the first to emerge from shaved skin, giving the appearance and feel of thicker-growing hair. Yet this thick base naturally wears down into a thinner tip over time as the hair continues to grow.
However, there may be at least one interesting ramification of closely shaving your skin when it comes to hair growth.
(Kurt Stenn.Business Insider)
"If you roughen it up, the hair will be stimulated to grow back," he said, adding that it's just not yet proven the hair grows back thicker."Scientists have tried to demonstrate, to test this idea, and some scientists claim that this occurs," he said. "But usually the science is not very good. I don't think it's ever been demonstrated clearly that cutting or roughing your skin causes the hair to come back thicker — it comes back quicker."
Like the rest of us, Stenn isn't growing any younger and would love for this to be true.
If it were, he added: "Then balding should go away. It doesn't."
-
THE REAL REASONS WHY YOUR EYE MAKEUP IS ALWAYS SMUDGING
One of the first things people who just met me ask – as soon they learn that I write for the beauty beat in a magazine title – is: “Which mascara/eyeliner should I use that won’t smudge?”
I usually respond by giving them a list of product recommendations while they take notes. But this is actually the shortcut answer. And in all honesty, my recommendations might not prove to be as failsafe as these hopefuls expect. Here are all the reasons why:
1. Everyone’s eye shape and eyelid movement is different

Photo: 123rf
Just like no two person’s fingerprints are the same, I believe that no two person’s eye shapesare the same. Heck, for most of us, our two eyes aren’t even symmetrical. This means that when we blink, our eyelids move and fold in different ways, and it is precisely when the skin folds and creates contact that smudging of eye makeup occurs. Some people blink harder than others, or others have hooded upper eyelids, which cause eyeliner on the upper eyelids to transfer to the undereye area more easily when they blink.
If your eye makeup always smudges because of blinking, you can’t really stop blinking, right? So simply avoid drawing eyeliner and eyeshadow too heavily close to your lash line, and definitely avoid filling in the waterline with eyeliner. Also, try a transfer resistant formula like Heroine Make Smooth Liquid Eyeliner Waterproof, $15.90 from firstbeauty.com.sg or Kat Von D Tattoo Liner, $32 from Sephora.
2. Skin type plays a part

Photo: 123rf
Some people have oily skin, others have dry skin, and then there’s every combination skin type in-between too. Your facial skin type also extends to the skin around the eyes and hence there are people with oilier eyelids than others. The oilier your eyelids, the more your eye makeup will smudge, it’s only logic. And get this: Even the most waterproof of formulas sometimes don't work for people with excessively oily eyelids. But this doesn’t mean that you can’t do anything about it. Applying an eyelid primer may help in varying degrees, depending on how oily your skin is and other factors like your eye shape and blinking movements. Try Essence I love stage base for eyeshadow & concealer, $4.50 from Watsons or Smashbox 24 Hour Photo Finish Shadow Primer, $39 from Sephora.
3. Shifting factors

Photos: Instagram @caradelevingne, @victoriabeckham and @kunismilax
No matter how prepared you are or which waterproof products you use, as long as you wear eye makeup – liner, shadows, mascara – there is potential for smudging at any time. This is simply because all the factors involved are changing all the time. Our skin quality and sebum level changes according to the environment, the movement of our eyes shift and change too.
For example, I have come to rely on some pretty budge-proof eyeliners and mascaras through years of trial and error, but whenever I come down with a cold, none of them hold up against my hard sneezes as my eyes press shut really tightly with each “ah-choo”. When these unfortunate situations happen, there’s not much you can do but use a cleansing wipe to remove all your eye makeup, thoroughly and just try again later... or tomorrow. Otherwise, simply embrace the smudgy smoky eyes look à la Cara Delevingne, Victoria Beckham, Mila Kunis… the list goes on… which goes to show that you’re not alone in your smudged eye makeup plight.
-
What about microblading ? How many of you have it instead of daily applying an eyebrow pencil ?
-
I would like to share my pleasant experiences with the best beauty centre. They are very nice and patient to me as this is my first time doing it and I'm really scared. Highly recommended!!


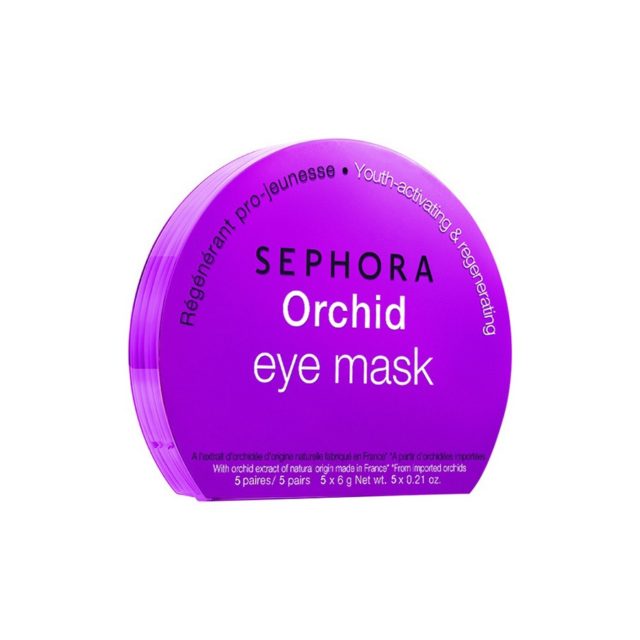 Image credit: sephora.sg
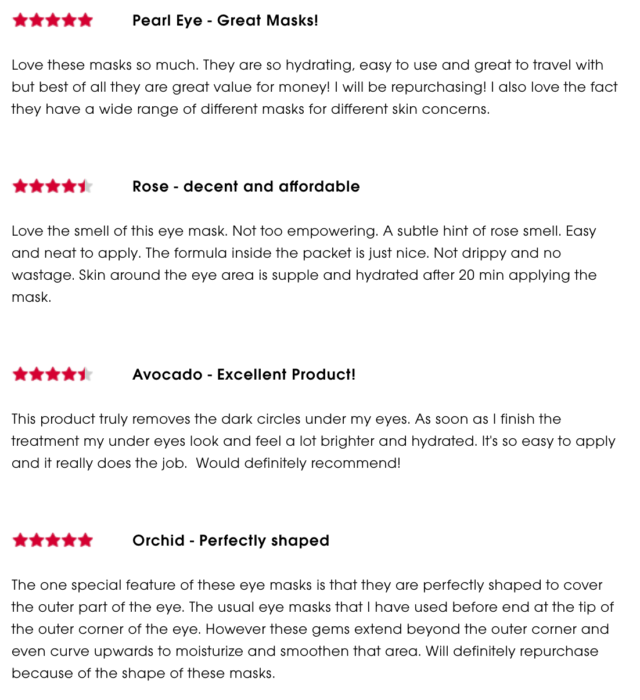
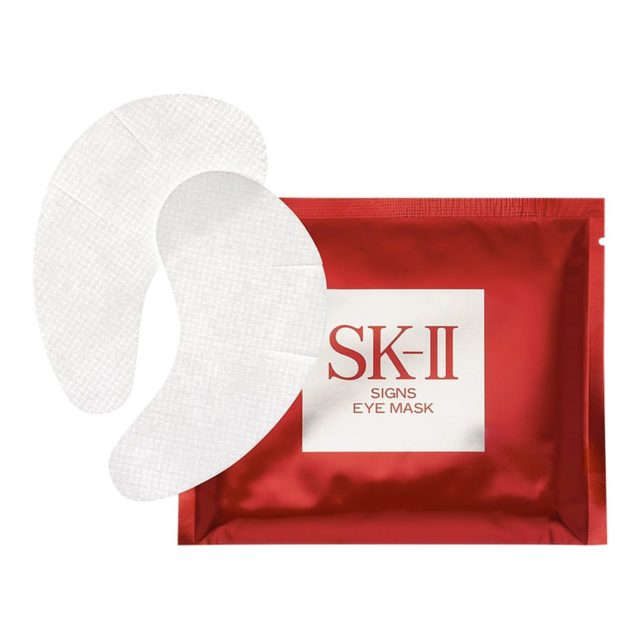 Image credit: sephora.sg
 Image credit: guardian.com.sg
 Image credit: erinfinity.com
 Image credit: net-a-porter.com/sg
 Image credit: sephora.sg
 Image credit: mywomenstuff.com
 Image credit: sephora.com


